Clean all Mysql Data

/etc/init.d/mysql stop
/etc/init.d/mysql start
mysql -uroot
mysql -uroot聽聽 -e “show databases” | grep -v Database | grep -v mysql| grep -v information_schema| grep -v test | grep -v OLD |gawk ‘{print “drop database ” $1 “;select sleep(0.1);”}’ | mysql -uroot
/etc/init.d/mysql stop
rm ibdata1
rm ib_logfile*
rm -rf mysql
mysql_install_db
/usr/bin/mysqld_safe
/usr/bin/mysql_secure_installation


Enjoy

Fedora 19 Network Bonding without networkmanager

fedora_19_bonding

If your new server has two network interfaces use both in bonding can help you to get a better performance or failover tolerance.

If you want to create a bonding device first you need to disable network manager.

systemctl stop NetworkManager.service
systemctl disable NetworkManager.service

systemctl enable network.service
systemctl start network.service

Now you need to configure your network interfaces

ip link show

is the way to get your devices list

1: lo: <LOOPBACK,UP,LOWER_UP> mtu 65536 qdisc noqueue state UNKNOWN mode DEFAULT
link/loopback 00:00:00:00:00:00 brd 00:00:00:00:00:00
2: p33p1: <BROADCAST,MULTICAST,UP,LOWER_UP> mtu 1500 qdisc pfifo_fast state UP mode DEFAULT qlen 1000
link/ether ca:fe:ca:fe:ca:fe brd ff:ff:ff:ff:ff:ff
3: p2p1: <BROADCAST,MULTICAST> mtu 1500 qdisc pfifo_fast state DOWN mode DEFAULT qlen 1000
link/ether ca:fe:ca:fe:ca:ff brd ff:ff:ff:ff:ff:ff

in my case I have two network cards p33p1 and p2p1

If i move to /etc/sysconfig/network-scripts and make a ls i will see two files

ifcfg-enp2s0 and ifcfg-enp3s0

edit both files to appear like these

BOOTPROTO=none
NAME=<device name>
UUID= <leave as is>
HWADDR=<leave as is>
NM_CONTROLLED=”no”
MASTER=”bond0″
SLAVE=”yes”

Creating bond interface

create a file /etc/modprobe.d/bonding.conf with the content

alias bond0 bonding

Create a file in /etc/sysconfig/network-scripts/ifcfg-bond0

DEVICE=bond0
BOOTPROTO=dhcp
ONBOOT=yes
BONDING_OPTS=”mode=0 ”
USERCTL=no
NM_CONTROLLED=”no”

reboot your system and enjoy 馃槢

Acelerating openbravo Pos cash desk closing

After several years using Openbravo Pos in my family’s business,聽 My father聽 says that cash desk closing takes about 5 minutes and growing every day that was a bit annoying.

  • backup database
  • reconfigure my.conf enabling聽innodb_file_per_table,
  • restart mysql
  • drop database
  • restore
  • and pass a mysqlcheck with optimize option


didn’t show a big performance increase.

Finally the solution was adding indexes into tables.

ALTER TABLE TAXLINES ADD INDEX receipt (RECEIPT);
ALTER TABLE TAXLINES ADD INDEX taxid (TAXID);
ALTER TABLE TAXES ADD INDEX category (category);
ALTER TABLE RECEIPTS ADD INDEX money (money);

Point of sale

Acpi problems in Centos with D945GCLF

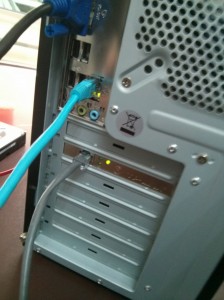
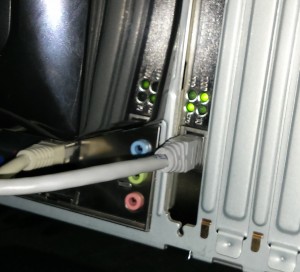
I decided upgrade my home fileserver computer a D945GCLF motherboard adding a new 10/100/1000 pci ethernet card. After configure the new ethernet controller in my centos 6 and start downloading isos and big files I saw that kacpid process uses one cpu at 100% all time. I check the syslog and hundreds of lines like these appears

ACPI Error (psparse-0537): Method parse/execution failed [\_SB_.PCI0.LPC_.SMBR] (Node ), AE_AML_INFINITE_LOOP
ACPI Error (psparse-0537): Method parse/execution failed [\_SB_.PCI0.LPC_.INIT] (Node ), AE_AML_INFINITE_LOOP
ACPI Error (psparse-0537): Method parse/execution failed [\_GPE._L00] (Node ), AE_AML_INFINITE_LOOP
ACPI Exception: AE_AML_INFINITE_LOOP, while evaluating GPE method [_L00] (20090903/evgpe-568)

If I disable the acpi in grub at next reboot the system lost one core and framebuffer etc etc.

What was the solution?

simply, Just Update the bios to the latest LF94510J.86A.0278.2010.0414.2000

Now I can enjoy 4x more speed that with integrated network card 馃檪

new networkcard

mt-daapd Centos 6 EPEL

I was triying to install a mt-daapd service into mi home server and found this error when I was starting the service
service mt-daapd start
Starting DAAP server: mt-daapd: client.c:778: avahi_client_errno: Assertion `client’ failed.
/bin/bash: line 1: 5063 Aborted /usr/sbin/mt-daapd

The problem was that you need the AVAHI daemon running to start mt-daapd server

yum install avahi
chkconfig avahi-daemon on
/etc/init.d/avahi-daemon start

service mt-daapd start


And now MT-Daap is working

Install BackupPC on Centos 6.3

BackupPC logo

Backups are important, every hard disk, every motherboard, every piece of hardware will fail.聽 Remember this if you don’t have a backup system.

Step 1. Install required software

enable epel repo

yum install wget

wget http://ftp.rediris.es/mirror/fedora-epel/6/i386/epel-release-6-7.noarch.rpm
rpm -i epel-release-6-7.noarch.rpm

yum install BackupPC

Step 2:enable Apache webserver

edit apache config file

vi /etc/httpd/conf/httpd.conf

and make apache run as backuppc user

User backuppc

edit BackupPC apache config

vi /etc/httpd/conf.d/BackupPC.conf

should be like these

<IfModule !mod_authz_core.c>
# Apache 2.2
order deny,allow
allow from all
allow from 127.0.0.1
allow from ::1
require valid-user
</IfModule>

chkconfig httpd on

/etc/init.d/httpd start

Step 3: Configure Backuppc password

htpasswd -c /etc/BackupPC/apache.users backuppc

Step 4: Enable BackupPC Service

chkconfig backuppc on

/etc/init.d/backuppc start

Step 5: Verify installation

open a browser and navigate to

http://<Backupchost>/backuppc

Clean backup pc install

sudo and /etc/sudoers.d directory

sudo logo

I needed to add a new user into sudoers file into several debian machines, i didn’t want open a terminal in each machine and add the line manually, the other option was append a new line into the file like echo “new line”>> /etc/sudoers .But I don’t like edit sudoers file without using visudo, I don’t feel safe.

Reading the debian documentation I found a magical directive for append external files #includedir /etc/sudoers.d, that’s mean if I add a new file聽 with 0440 permisions and the permissions are important will be appended into our sudo config.

Removing the hash character is a inherited custom ok don’t remove the hash character聽 is not a comment indicador withouth the hash character, includedir /etc/sudoers.d is a bad line and visudo show an error.

Migrating from M0n0wall to pfSense

During the last year,聽 talking with some colleages about firewalls and operative systems the mayor part of then said that they’re using, Pfsense instead M0n0wall. Recently I get a new job and my home networks are in the same range that the work network and some clients. To avoid this situation I decided migrate my router from M0n0wall to Pfsense and thats are the steps:

I decided maintain a copy of the actual M0n0wall config, bougth a new compact flash was the quick option.

Download pfSense

First I downloaded the version for my router, in this case it’s and ALIX Board without VGA,, that means that i need to choose the nanobsd version and my compactFlash size is 4Gb, if I had a bigger campactFlash I just only need to take the 4gb versi贸n.

wget
wget

wget

Verify downloaded image:

md5sum pfSense-2.0.1-RELEASE-4g-i386-nanobsd.img.gz

and check if output it’s the same that content in /pfSense-2.0.1-RELEASE-4g-i386-nanobsd.img.gz.md5

sha256sum pfSense-2.0.1-RELEASE-4g-i386-nanobsd.img.gz

and check if output it’s the same that content in /pfSense-2.0.1-RELEASE-4g-i386-nanobsd.img.gz.sha256

Dump pfSense into the compact flash

In my case as fedora user i need to detect what device file is linked to my compactFlash i make this

open a root cosole and write

mount >mountedBefore

this generate a file with actual mounted files

i attach the compact flash and execute

mount >mountedAfter

now i write

diff mountedBefore mountedAfter

and the output will be like:

> /dev/sdd1 on /run/media/luzem/753C-3741 type vfat (rw,nosuid,nodev,relatime,uid=1000,gid=1000,fmask=0022,dmask=0077,codepage=cp437,iocharset=ascii,shortname=mixed,showexec,utf8,errors=remount-ro,uhelper=udisks2)

It said that my compact flash is on /dev/sdd file

first i need to umount it

umount /dev/sdd1

now i decompress and dump pfSense into compact flash writing

zcat pfSense-2.0.1-RELEASE-4g-i386-nanobsd.img.gz | dd of=/dev/sdd bs=16k

you should get and output like these

244138+1 records in
244138+1 records out
3999969792 bytes (4.0 GB) copied, 226.826 s, 17.6 MB/s

Putting pfSense into alix board

Now plug the compactFlash on your board

connect your board , power, ethernet ….

enjoy reconfiguring yout new router
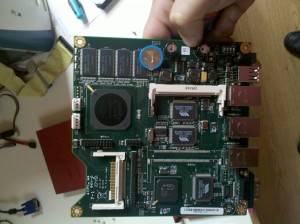
alix 2d3

Setting up a Php Continuous integration environment in Centos 6

As part of my job I need to create a continuous integration environment for my develops in Php.

first I installed Gitlab and then I installed Jenkins using the web page tutorial ( http://jenkins-ci.org/ ).

you need to have enabled EPEL repos http://fedoraproject.org/wiki/EPEL and rpm Fusion repos聽http://rpmfusion.org/ .

when you have Jenkins installed you will need install the needed packages open a root terminal and write:

yum install ant php php-phpunit-phploc php-pdepend-PHP-Depend.noarch php-phpmd-PHP-PMD.noarch php-phpunit-phpcpd.noarch php-phpunit-phploc.noarch php-pear-PHP-CodeSniffer.noarch php-phpunit-PHP-CodeBrowser.noarch

The next step is add the php template into Jenkins CI

  • cd /var/lib/jenkins/jobs
  • mkdir php-template
  • cd php-template
  • wget https://raw.github.com/sebastianbergmann/php-jenkins-template/master/config.xml
  • cd ..
  • chown -R jenkins:jenkins php-template/
  • /etc/init.d/jenkins restart

now we can create a new php project based on the php-template 馃檪