Starting from a minimal install.
step 1: enable extra repositories
yum install http://dl.fedoraproject.org/pub/epel/6/x86_64/epel-release-6-8.noarch.rpm

yum install http://repo.zabbix.com/zabbix/2.4/rhel/6/x86_64/zabbix-release-2.4-1.el6.noarch.rpm

yum install http://dev.mysql.com/get/mysql-community-release-el6-5.noarch.rpm

yum install http://nginx.org/packages/centos/6/noarch/RPMS/nginx-release-centos-6-0.el6.ngx.noarch.rpm

yum -y update
step 2: configure mysql database
yum -y install mysql-server.x86_64

vim /etc/my.cnf
Your config file should be like these.
Note: I activate binlog without purge because can be useful if you need to recover data or attach a mysql slave.
# For advice on how to change settings please see
# http://dev.mysql.com/doc/refman/5.6/en/server-configuration-defaults.html

[mysqld]
#
# Remove leading # and set to the amount of RAM for the most important data
# cache in MySQL. Start at 70% of total RAM for dedicated server, else 10%.
# innodb_buffer_pool_size = 128M
#
# Remove leading # to turn on a very important data integrity option: logging
# changes to the binary log between backups.
# log_bin
#
# Remove leading # to set options mainly useful for reporting servers.
# The server defaults are faster for transactions and fast SELECTs.
# Adjust sizes as needed, experiment to find the optimal values.
# join_buffer_size = 128M
# sort_buffer_size = 2M
# read_rnd_buffer_size = 2M
datadir=/var/lib/mysql
socket=/var/lib/mysql/mysql.sock

# Disabling symbolic-links is recommended to prevent assorted security risks
symbolic-links=0

# Recommended in standard MySQL setup
sql_mode=NO_ENGINE_SUBSTITUTION,STRICT_TRANS_TABLES

#allow tcp connections
port = 3306

#innodb options
innodb_file_format=Barracuda
innodb_file_per_table
innodb_flush_method=O_DIRECT

#replication
log-bin=mysql-bin
binlog_format=MIXED
max_binlog_size=256M

#Enable performance schema
performance_schema

[mysqld_safe]
log-error=/var/log/mysqld.log
pid-file=/var/run/mysqld/mysqld.pid
enable mysql daemon
chkconfig mysqld on

start mysql daemon

service mysqld start

secure mysql installation

/usr/bin/mysql_secure_installation
allow incoming 3306 connections
/sbin/iptables -A INPUT -i eth0 -p tcp --destination-port 3306 -j ACCEPT
service iptables save
step 3: configure database backup
This is important because after a lot of power outages and hard disk problems sometimes you can’t recover your database and restore a backup is faster than reinstall or the only way.
yum install wget pbzip2
mysql -uroot -p
create backup user
GRANT LOCK TABLES, SELECT ON *.* TO 'BACKUPUSER'@'%' IDENTIFIED BY 'PASSWORD';
flush privileges;
exit
install AutoMysqlBackup
wget http://www.mirrorservice.org/sites/downloads.sourceforge.net/a/au/automysqlbackup/AutoMySQLBackup/AutoMySQLBackup%20VER%203.0/automysqlbackup-v3.0_rc6.tar.gz
tar xzvf automysqlbackup-v3.0_rc6.tar.gz
/install.sh
mkdir /var/backup/
mkdir /var/backup/db
we need to adjust our config file
vim /etc/automysqlbackup/myserver.conf
should look like these
note: I select bzip because it gets better results
#version=3.0_rc2
# DONT'T REMOVE THE PREVIOUS VERSION LINE!
#
# Uncomment to change the default values (shown after =)
# WARNING:
# This is not true for UMASK, CONFIG_prebackup and CONFIG_postbackup!!!
#
# Default values are stored in the script itself. Declarations in
# /etc/automysqlbackup/automysqlbackup.conf will overwrite them. The
# declarations in here will supersede all other.

# Edit $PATH if mysql and mysqldump are not located in /usr/local/bin:/usr/bin:/bin:/usr/local/mysql/bin
#PATH=${PATH}:FULL_PATH_TO_YOUR_DIR_CONTAINING_MYSQL:FULL_PATH_TO_YOUR_DIR_CONTAINING_MYSQLDUMP

# Basic Settings

# Username to access the MySQL server e.g. dbuser
CONFIG_mysql_dump_username='backupuser'

# Password to access the MySQL server e.g. password
CONFIG_mysql_dump_password='yourbackupuserpass'

# Host name (or IP address) of MySQL server e.g localhost
CONFIG_mysql_dump_host='localhost'

# "Friendly" host name of MySQL server to be used in email log
# if unset or empty (default) will use CONFIG_mysql_dump_host instead
#CONFIG_mysql_dump_host_friendly=''

# Backup directory location e.g /backups
CONFIG_backup_dir='/var/backup/db'

# This is practically a moot point, since there is a fallback to the compression
# functions without multicore support in the case that the multicore versions aren't
# present in the system. Of course, if you have the latter installed, but don't want
# to use them, just choose no here.
# pigz -> gzip
# pbzip2 -> bzip2
CONFIG_multicore='yes'

# Number of threads (= occupied cores) you want to use. You should - for the sake
# of the stability of your system - not choose more than (#number of cores - 1).
# Especially if the script is run in background by cron and the rest of your system
# has already heavy load, setting this too high, might crash your system. Assuming
# all systems have at least some sort of HyperThreading, the default is 2 threads.
# If you wish to let pigz and pbzip2 autodetect or use their standards, set it to
# 'auto'.
CONFIG_multicore_threads='auto'

# Databases to backup

# List of databases for Daily/Weekly Backup e.g. ( 'DB1' 'DB2' 'DB3' ... )
# set to (), i.e. empty, if you want to backup all databases
CONFIG_db_names=()
# You can use
#declare -a MDBNAMES=( "${DBNAMES[@]}" 'added entry1' 'added entry2' ... )
# INSTEAD to copy the contents of $DBNAMES and add further entries (optional).

# List of databases for Monthly Backups.
# set to (), i.e. empty, if you want to backup all databases
#CONFIG_db_month_names=()

# List of DBNAMES to EXLUCDE if DBNAMES is empty, i.e. ().
CONFIG_db_exclude=( 'information_schema' 'performance_schema' )

# List of tables to exclude, in the form db_name.table_name
# You may use wildcards for the table names, i.e. 'mydb.a*' selects all tables starting with an 'a'.
# However we only offer the wildcard '*', matching everything that could appear, which translates to the
# '%' wildcard in mysql.
#CONFIG_table_exclude=()

# Advanced Settings

# Rotation Settings

# Which day do you want monthly backups? (01 to 31)
# If the chosen day is greater than the last day of the month, it will be done
# on the last day of the month.
# Set to 0 to disable monthly backups.
CONFIG_do_monthly="01"

# Which day do you want weekly backups? (1 to 7 where 1 is Monday)
# Set to 0 to disable weekly backups.
CONFIG_do_weekly="5"

# Set rotation of daily backups. VALUE*24hours
# If you want to keep only today's backups, you could choose 1, i.e. everything older than 24hours will be removed.
CONFIG_rotation_daily=6

# Set rotation for weekly backups. VALUE*24hours
CONFIG_rotation_weekly=35

# Set rotation for monthly backups. VALUE*24hours
CONFIG_rotation_monthly=150

# Server Connection Settings

# Set the port for the mysql connection
CONFIG_mysql_dump_port=3306

# Compress communications between backup server and MySQL server?
#CONFIG_mysql_dump_commcomp='no'

# Use ssl encryption with mysqldump?
#CONFIG_mysql_dump_usessl='yes'

# For connections to localhost. Sometimes the Unix socket file must be specified.
CONFIG_mysql_dump_socket='/var/lib/mysql/mysql.sock'

# The maximum size of the buffer for client/server communication. e.g. 16MB (maximum is 1GB)
#CONFIG_mysql_dump_max_allowed_packet=''

# This option sends a START TRANSACTION SQL statement to the server before dumping data. It is useful only with
# transactional tables such as InnoDB, because then it dumps the consistent state of the database at the time
# when BEGIN was issued without blocking any applications.
#
# When using this option, you should keep in mind that only InnoDB tables are dumped in a consistent state. For
# example, any MyISAM or MEMORY tables dumped while using this option may still change state.
#
# While a --single-transaction dump is in process, to ensure a valid dump file (correct table contents and
# binary log coordinates), no other connection should use the following statements: ALTER TABLE, CREATE TABLE,
# DROP TABLE, RENAME TABLE, TRUNCATE TABLE. A consistent read is not isolated from those statements, so use of
# them on a table to be dumped can cause the SELECT that is performed by mysqldump to retrieve the table
# contents to obtain incorrect contents or fail.
CONFIG_mysql_dump_single_transaction='yes'

# http://dev.mysql.com/doc/refman/5.0/en/mysqldump.html#option_mysqldump_master-data
# --master-data[=value]
# Use this option to dump a master replication server to produce a dump file that can be used to set up another
# server as a slave of the master. It causes the dump output to include a CHANGE MASTER TO statement that indicates
# the binary log coordinates (file name and position) of the dumped server. These are the master server coordinates
# from which the slave should start replicating after you load the dump file into the slave.
#
# If the option value is 2, the CHANGE MASTER TO statement is written as an SQL comment, and thus is informative only;
# it has no effect when the dump file is reloaded. If the option value is 1, the statement is not written as a comment
# and takes effect when the dump file is reloaded. If no option value is specified, the default value is 1.
#
# This option requires the RELOAD privilege and the binary log must be enabled.
#
# The --master-data option automatically turns off --lock-tables. It also turns on --lock-all-tables, unless
# --single-transaction also is specified, in which case, a global read lock is acquired only for a short time at the
# beginning of the dump (see the description for --single-transaction). In all cases, any action on logs happens at
# the exact moment of the dump.
# ==================================================================================================================
# possible values are 1 and 2, which correspond with the values from mysqldump
# VARIABLE=    , i.e. no value, turns it off (default)
#
#CONFIG_mysql_dump_master_data=

# Included stored routines (procedures and functions) for the dumped databases in the output. Use of this option
# requires the SELECT privilege for the mysql.proc table. The output generated by using --routines contains
# CREATE PROCEDURE and CREATE FUNCTION statements to re-create the routines. However, these statements do not
# include attributes such as the routine creation and modification timestamps. This means that when the routines
# are reloaded, they will be created with the timestamps equal to the reload time.
#
# If you require routines to be re-created with their original timestamp attributes, do not use --routines. Instead,
# dump and reload the contents of the mysql.proc table directly, using a MySQL account that has appropriate privileges
# for the mysql database.
#
# This option was added in MySQL 5.0.13. Before that, stored routines are not dumped. Routine DEFINER values are not
# dumped until MySQL 5.0.20. This means that before 5.0.20, when routines are reloaded, they will be created with the
# definer set to the reloading user. If you require routines to be re-created with their original definer, dump and
# load the contents of the mysql.proc table directly as described earlier.
#
CONFIG_mysql_dump_full_schema='yes'

# Backup status of table(s) in textfile. This is very helpful when restoring backups, since it gives an idea, what changed
# in the meantime.
CONFIG_mysql_dump_dbstatus='yes'

# Backup dump settings

# Include CREATE DATABASE in backup?
CONFIG_mysql_dump_create_database='no'

# Separate backup directory and file for each DB? (yes or no)
CONFIG_mysql_dump_use_separate_dirs='yes'

# Choose Compression type. (gzip or bzip2)
CONFIG_mysql_dump_compression='bzip2'

# Store an additional copy of the latest backup to a standard
# location so it can be downloaded by third party scripts.
CONFIG_mysql_dump_latest='yes'

# Remove all date and time information from the filenames in the latest folder.
# Runs, if activated, once after the backups are completed. Practically it just finds all files in the latest folder
# and removes the date and time information from the filenames (if present).
CONFIG_mysql_dump_latest_clean_filenames='no'

# Create differential backups. Master backups are created weekly at #$CONFIG_do_weekly weekday. Between master backups,
# diff is used to create differential backups relative to the latest master backup. In the Manifest file, you find the
# following structure
# $filename     md5sum  $md5sum diff_id $diff_id        rel_id  $rel_id
# where each field is separated by the tabular character '\t'. The entries with $ at the beginning mean the actual values,
# while the others are just for readability. The diff_id is the id of the differential or master backup which is also in
# the filename after the last _ and before the suffixes begin, i.e. .diff, .sql and extensions. It is used to relate
# differential backups to master backups. The master backups have 0 as $rel_id and are thereby identifiable. Differential
# backups have the id of the corresponding master backup as $rel_id.
#
# To ensure that master backups are kept long enough, the value of $CONFIG_rotation_daily is set to a minimum of 21 days.
#
CONFIG_mysql_dump_differential='no'

# Notification setup

# What would you like to be mailed to you?
# - log   : send only log file
# - files : send log file and sql files as attachments (see docs)
# - stdout : will simply output the log to the screen if run manually.
# - quiet : Only send logs if an error occurs to the MAILADDR.
CONFIG_mailcontent='stdout'

# Set the maximum allowed email size in k. (4000 = approx 5MB email [see docs])
CONFIG_mail_maxattsize=4000

# Allow packing of files with tar and splitting it in pieces of CONFIG_mail_maxattsize.
#CONFIG_mail_splitandtar='yes'

# Use uuencode instead of mutt. WARNING: Not all email clients work well with uuencoded attachments.
#CONFIG_mail_use_uuencoded_attachments='no'

# Email Address to send mail to? (user@domain.com)
CONFIG_mail_address='luzem@luzem.com'

# Encryption

# Do you wish to encrypt your backups using openssl?
#CONFIG_encrypt='no'

# Choose a password to encrypt the backups.
#CONFIG_encrypt_password='password0123'

# Other

# Backup local files, i.e. maybe you would like to backup your my.cnf (mysql server configuration), etc.
# These files will be tar'ed, depending on your compression option CONFIG_mysql_dump_compression compressed and
# depending on the option CONFIG_encrypt encrypted.
#
# Note: This could also have been accomplished with CONFIG_prebackup or CONFIG_postbackup.
#CONFIG_backup_local_files=()

# Command to run before backups (uncomment to use)
#CONFIG_prebackup="/etc/mysql-backup-pre"

# Command run after backups (uncomment to use)
#CONFIG_postbackup="/etc/mysql-backup-post"

# Uncomment to activate! This will give folders rwx------
# and files rw------- permissions.
#umask 0077

# dry-run, i.e. show what you are gonna do without actually doing it
# inactive: =0 or commented out
# active: uncommented AND =1
#CONFIG_dryrun=1
at next step we add a cron line to run our backup every day
vim /etc/cron.daily/runmysqlbackup
the content should be like these
#!/bin/sh
/usr/local/bin/automysqlbackup /etc/automysqlbackup/myserver.conf
chown root.root /var/backup/db* -R
find /var/backup/db* -type f -exec chmod 400 {} \;
find /var/backup/db* -type d -exec chmod 700 {} \;
you should make your script executable
chmod +x /etc/cron.daily/runmysqlbackup
if you wanna try just execute
/etc/cron.daily/runmysqlbackup
and check /var/backup/db directory
and now you will have a daily backup 😛
Step 4: Install zabbix server
yum install zabbix-server-mysql zabbix-web-mysql zabbix-agent
service zabbix-server start
service zabbix-agent start
chkconfig zabbix-agent on
we need to create a zabbix database user and a zabbix database
mysql -uroot -p
execute these sentences
create database zabbix character set utf8 collate utf8_bin;
grant all privileges on zabbix.* to zabbix@localhost identified by 'zabbixdatabasepasword';
flush privileges;
exit
next step is populate table structures
note: sql commands should changue check a should be in /usr/share/doc/zabbix-server-mysql-<version>/create
mysql -uroot -p zabbix &amp;lt; /usr/share/doc/zabbix-server-mysql-2.4.2/create/schema.sql mysql -uroot -p zabbix &amp;lt; /usr/share/doc/zabbix-server-mysql-2.4.2/create/images.sql mysql -uroot -p zabbix &amp;lt; /usr/share/doc/zabbix-server-mysql-2.4.2/create/data.sql
at this point we have out zabbix database its time to link zabbix and database
vim /etc/zabbix/zabbix_server.conf
your config file shoul be like these
# This is a configuration file for Zabbix Server process
# To get more information about Zabbix,
# visit http://www.zabbix.com
############ GENERAL PARAMETERS #################
### Option: ListenPort
# Listen port for trapper.
#
# Mandatory: no
# Range: 1024-32767
# Default:
# ListenPort=10051
### Option: SourceIP
# Source IP address for outgoing connections.
#
# Mandatory: no
# Default:
# SourceIP=
### Option: LogFile
# Name of log file.
# If not set, syslog is used.
#
# Mandatory: no
# Default:
# LogFile=
LogFile=/var/log/zabbix/zabbix_server.log
### Option: LogFileSize
# Maximum size of log file in MB.
# 0 - disable automatic log rotation.
#
# Mandatory: no
# Range: 0-1024
# Default:
# LogFileSize=1
LogFileSize=0
### Option: DebugLevel
# Specifies debug level
# 0 - basic information about starting and stopping of Zabbix processes
# 1 - critical information
# 2 - error information
# 3 - warnings
# 4 - for debugging (produces lots of information)
#
# Mandatory: no
# Range: 0-4
# Default:
# DebugLevel=3
### Option: PidFile
# Name of PID file.
#
# Mandatory: no
# Default:
# PidFile=/tmp/zabbix_server.pid
PidFile=/var/run/zabbix/zabbix_server.pid
### Option: DBHost
# Database host name.
# If set to localhost, socket is used for MySQL.
# If set to empty string, socket is used for PostgreSQL.
#
# Mandatory: no
# Default:
DBHost=localhost
### Option: DBName
# Database name.
# For SQLite3 path to database file must be provided. DBUser and DBPassword are ignored.
#
# Mandatory: yes
# Default:
# DBName=
DBName=zabbix
### Option: DBSchema
# Schema name. Used for IBM DB2 and PostgreSQL.
#
# Mandatory: no
# Default:
# DBSchema=
### Option: DBUser
# Database user. Ignored for SQLite.
#
# Mandatory: no
# Default:
# DBUser=
DBUser=zabbix
### Option: DBPassword
# Database password. Ignored for SQLite.
# Comment this line if no password is used.
#
# Mandatory: no
# Default:
DBPassword=zabbixdatabasepasword
### Option: DBSocket
# Path to MySQL socket.
#
# Mandatory: no
# Default:
# DBSocket=/tmp/mysql.sock
DBSocket=/var/lib/mysql/mysql.sock
### Option: DBPort
# Database port when not using local socket. Ignored for SQLite.
#
# Mandatory: no
# Range: 1024-65535
# Default (for MySQL):
# DBPort=3306
############ ADVANCED PARAMETERS ################
### Option: StartPollers
# Number of pre-forked instances of pollers.
#
# Mandatory: no
# Range: 0-1000
# Default:
# StartPollers=5
### Option: StartIPMIPollers
# Number of pre-forked instances of IPMI pollers.
#
# Mandatory: no
# Range: 0-1000
# Default:
# StartIPMIPollers=0
### Option: StartPollersUnreachable
# Number of pre-forked instances of pollers for unreachable hosts (including IPMI and Java).
# At least one poller for unreachable hosts must be running if regular, IPMI or Java pollers
# are started.
#
# Mandatory: no
# Range: 0-1000
# Default:
# StartPollersUnreachable=1
### Option: StartTrappers
# Number of pre-forked instances of trappers.
# Trappers accept incoming connections from Zabbix sender, active agents and active proxies.
# At least one trapper process must be running to display server availability and view queue
# in the frontend.
#
# Mandatory: no
# Range: 0-1000
# Default:
# StartTrappers=5
### Option: StartPingers
# Number of pre-forked instances of ICMP pingers.
#
# Mandatory: no
# Range: 0-1000
# Default:
# StartPingers=1
### Option: StartDiscoverers
# Number of pre-forked instances of discoverers.
#
# Mandatory: no
# Range: 0-250
# Default:
# StartDiscoverers=1
### Option: StartHTTPPollers
# Number of pre-forked instances of HTTP pollers.
#
# Mandatory: no
# Range: 0-1000
# Default:
# StartHTTPPollers=1
### Option: StartTimers
# Number of pre-forked instances of timers.
# Timers process time-based trigger functions and maintenance periods.
# Only the first timer process handles the maintenance periods.
#
# Mandatory: no
# Range: 1-1000
# Default:
# StartTimers=1
### Option: JavaGateway
# IP address (or hostname) of Zabbix Java gateway.
# Only required if Java pollers are started.
#
# Mandatory: no
# Default:
# JavaGateway=
### Option: JavaGatewayPort
# Port that Zabbix Java gateway listens on.
#
# Mandatory: no
# Range: 1024-32767
# Default:
# JavaGatewayPort=10052
### Option: StartJavaPollers
# Number of pre-forked instances of Java pollers.
#
# Mandatory: no
# Range: 0-1000
# Default:
# StartJavaPollers=0
### Option: StartVMwareCollectors
# Number of pre-forked vmware collector instances.
#
# Mandatory: no
# Range: 0-250
# Default:
# StartVMwareCollectors=0
### Option: VMwareFrequency
# How often Zabbix will connect to VMware service to obtain a new data.
#
# Mandatory: no
# Range: 10-86400
# Default:
# VMwareFrequency=60
### Option: VMwareCacheSize
# Size of VMware cache, in bytes.
# Shared memory size for storing VMware data.
# Only used if VMware collectors are started.
#
# Mandatory: no
# Range: 256K-2G
# Default:
# VMwareCacheSize=8M
### Option: SNMPTrapperFile
# Temporary file used for passing data from SNMP trap daemon to the server.
# Must be the same as in zabbix_trap_receiver.pl or SNMPTT configuration file.
#
# Mandatory: no
# Default:
# SNMPTrapperFile=/tmp/zabbix_traps.tmp
SNMPTrapperFile=/var/log/snmptt/snmptt.log
### Option: StartSNMPTrapper
# If 1, SNMP trapper process is started.
#
# Mandatory: no
# Range: 0-1
# Default:
# StartSNMPTrapper=0
### Option: ListenIP
# List of comma delimited IP addresses that the trapper should listen on.
# Trapper will listen on all network interfaces if this parameter is missing.
#
# Mandatory: no
# Default:
# ListenIP=0.0.0.0
# ListenIP=127.0.0.1
### Option: HousekeepingFrequency
# How often Zabbix will perform housekeeping procedure (in hours).
# Housekeeping is removing outdated information from the database.
# To prevent Housekeeper from being overloaded, no more than 4 times HousekeepingFrequency
# hours of outdated information are deleted in one housekeeping cycle, for each item.
# To lower load on server startup housekeeping is postponed for 30 minutes after server start.
#
# Mandatory: no
# Range: 1-24
# Default:
# HousekeepingFrequency=1
### Option: MaxHousekeeperDelete
# The table &amp;quot;housekeeper&amp;quot; contains &amp;quot;tasks&amp;quot; for housekeeping procedure in the format:
# [housekeeperid], [tablename], [field], [value].
# No more than 'MaxHousekeeperDelete' rows (corresponding to [tablename], [field], [value])
# will be deleted per one task in one housekeeping cycle.
# SQLite3 does not use this parameter, deletes all corresponding rows without a limit.
# If set to 0 then no limit is used at all. In this case you must know what you are doing!
#
# Mandatory: no
# Range: 0-1000000
# Default:
# MaxHousekeeperDelete=500
### Option: SenderFrequency
# How often Zabbix will try to send unsent alerts (in seconds).
#
# Mandatory: no
# Range: 5-3600
# Default:
# SenderFrequency=30
### Option: CacheSize
# Size of configuration cache, in bytes.
# Shared memory size for storing host, item and trigger data.
#
# Mandatory: no
# Range: 128K-8G
# Default:
# CacheSize=8M
### Option: CacheUpdateFrequency
# How often Zabbix will perform update of configuration cache, in seconds.
#
# Mandatory: no
# Range: 1-3600
# Default:
# CacheUpdateFrequency=60
### Option: StartDBSyncers
# Number of pre-forked instances of DB Syncers
#
# Mandatory: no
# Range: 1-100
# Default:
# StartDBSyncers=4
### Option: HistoryCacheSize
# Size of history cache, in bytes.
# Shared memory size for storing history data.
#
# Mandatory: no
# Range: 128K-2G
# Default:
# HistoryCacheSize=8M
### Option: TrendCacheSize
# Size of trend cache, in bytes.
# Shared memory size for storing trends data.
#
# Mandatory: no
# Range: 128K-2G
# Default:
# TrendCacheSize=4M
### Option: HistoryTextCacheSize
# Size of text history cache, in bytes.
# Shared memory size for storing character, text or log history data.
#
# Mandatory: no
# Range: 128K-2G
# Default:
# HistoryTextCacheSize=16M
### Option: ValueCacheSize
# Size of history value cache, in bytes.
# Shared memory size for caching item history data requests.
# Setting to 0 disables value cache.
#
# Mandatory: no
# Range: 0,128K-64G
# Default:
# ValueCacheSize=8M
### Option: Timeout
# Specifies how long we wait for agent, SNMP device or external check (in seconds).
#
# Mandatory: no
# Range: 1-30
# Default:
# Timeout=3
### Option: TrapperTimeout
# Specifies how many seconds trapper may spend processing new data.
#
# Mandatory: no
# Range: 1-300
# Default:
# TrapperTimeout=300
### Option: UnreachablePeriod
# After how many seconds of unreachability treat a host as unavailable.
#
# Mandatory: no
# Range: 1-3600
# Default:
# UnreachablePeriod=45
### Option: UnavailableDelay
# How often host is checked for availability during the unavailability period, in seconds.
#
# Mandatory: no
# Range: 1-3600
# Default:
# UnavailableDelay=60
### Option: UnreachableDelay
# How often host is checked for availability during the unreachability period, in seconds.
#
# Mandatory: no
# Range: 1-3600
# Default:
# UnreachableDelay=15
### Option: AlertScriptsPath
# Full path to location of custom alert scripts.
# Default depends on compilation options.
#
# Mandatory: no
# Default:
# AlertScriptsPath=${datadir}/zabbix/alertscripts
AlertScriptsPath=/usr/lib/zabbix/alertscripts
### Option: ExternalScripts
# Full path to location of external scripts.
# Default depends on compilation options.
#
# Mandatory: no
# Default:
# ExternalScripts=${datadir}/zabbix/externalscripts
ExternalScripts=/usr/lib/zabbix/externalscripts
### Option: FpingLocation
# Location of fping.
# Make sure that fping binary has root ownership and SUID flag set.
#
# Mandatory: no
# Default:
# FpingLocation=/usr/sbin/fping
### Option: Fping6Location
# Location of fping6.
# Make sure that fping6 binary has root ownership and SUID flag set.
# Make empty if your fping utility is capable to process IPv6 addresses.
#
# Mandatory: no
# Default:
# Fping6Location=/usr/sbin/fping6
### Option: SSHKeyLocation
# Location of public and private keys for SSH checks and actions.
#
# Mandatory: no
# Default:
# SSHKeyLocation=
### Option: LogSlowQueries
# How long a database query may take before being logged (in milliseconds).
# Only works if DebugLevel set to 3 or 4.
# 0 - don't log slow queries.
#
# Mandatory: no
# Range: 1-3600000
# Default:
# LogSlowQueries=0
### Option: TmpDir
# Temporary directory.
#
# Mandatory: no
# Default:
# TmpDir=/tmp
### Option: StartProxyPollers
# Number of pre-forked instances of pollers for passive proxies.
#
# Mandatory: no
# Range: 0-250
# Default:
# StartProxyPollers=1
### Option: ProxyConfigFrequency
# How often Zabbix Server sends configuration data to a Zabbix Proxy in seconds.
# This parameter is used only for proxies in the passive mode.
#
# Mandatory: no
# Range: 1-3600*24*7
# Default:
# ProxyConfigFrequency=3600
### Option: ProxyDataFrequency
# How often Zabbix Server requests history data from a Zabbix Proxy in seconds.
# This parameter is used only for proxies in the passive mode.
#
# Mandatory: no
# Range: 1-3600
# Default:
# ProxyDataFrequency=1
### Option: AllowRoot
# Allow the server to run as 'root'. If disabled and the server is started by 'root', the server
# will try to switch to the user specified by the User configuration option instead.
# Has no effect if started under a regular user.
# 0 - do not allow
# 1 - allow
#
# Mandatory: no
# Default:
# AllowRoot=0
### Option: User
# Drop privileges to a specific, existing user on the system.
# Only has effect if run as 'root' and AllowRoot is disabled.
#
# Mandatory: no
# Default:
# User=zabbix
### Option: Include
# You may include individual files or all files in a directory in the configuration file.
# Installing Zabbix will create include directory in /usr/local/etc, unless modified during the compile time.
#
# Mandatory: no
# Default:
# Include=
# Include=/usr/local/etc/zabbix_server.general.conf
# Include=/usr/local/etc/zabbix_server.conf.d/
# Include=/usr/local/etc/zabbix_server.conf.d/*.conf
### Option: SSLCertLocation
# Location of SSL client certificates.
# This parameter is used only in web monitoring.
#
# Mandatory: no
# Default:
# SSLCertLocation=${datadir}/zabbix/ssl/certs
### Option: SSLKeyLocation
# Location of private keys for SSL client certificates.
# This parameter is used only in web monitoring.
#
# Mandatory: no
# Default:
# SSLKeyLocation=${datadir}/zabbix/ssl/keys
### Option: SSLCALocation
# Override the location of certificate authority (CA) files for SSL server certificate verification.
# If not set, system-wide directory will be used.
# This parameter is used only in web monitoring.
#
# Mandatory: no
# Default:
# SSLCALocation=
####### LOADABLE MODULES #######
### Option: LoadModulePath
# Full path to location of server modules.
# Default depends on compilation options.
#
# Mandatory: no
# Default:
# LoadModulePath=${libdir}/modules
### Option: LoadModule
# Module to load at server startup. Modules are used to extend functionality of the server.
# Format: LoadModule=&amp;lt;module.so&amp;gt;
# The modules must be located in directory specified by LoadModulePath.
# It is allowed to include multiple LoadModule parameters.
#
# Mandatory: no
# Default:
# LoadModule=
its time to start our service and let it enabled
service zabbix-server start
chkconfig  zabbix-server on
setsebool -P zabbix_can_network 1
Step 4: Configure nginx and php-fpm server
We need to install several packages and open port 80 (http)
yum -y install nginx php-common php-fpm
/sbin/iptables -A INPUT -i eth0 -p tcp --destination-port 80 -j ACCEPT
service iptables save
chkconfig nginx on
chkconfig php-fpm  on
service nginx start
service php-fpm start
open a web browser and put your zabbix ip on it you should view a page like these
we need to adjust some php values
vim /etc/php.ini
changue these values
max_execution_time = 300

max_input_time = 300
post_max_size = 16M

date.timezone = Europe/Madrid

cgi.fix_pathinfo=1
if you don’t live in Spain here you have a list of timezones http://php.net/manual/en/timezones.php
next step is add zabbix domain to nginx
vim /etc/nginx/conf.d/zabbix.conf
file should look like these
server {
server_name zabbix.example.org;

root        /var/www/zabbix;
index       index.html index.php;
access_log  /var/log/nginx/access_zabbix.log main;
error_log   /var/log/nginx/error_zabbix.log error

location ~ \.php {
include fastcgi_params;
try_files $uri =404;
fastcgi_split_path_info ^(.+\.php)(/.+)$;
#fastcgi_intercept_errors on;
fastcgi_pass    unix:/var/run/php-zabbix.socket;
fastcgi_index   index.php;
fastcgi_param   SCRIPT_FILENAME $document_root$fastcgi_script_name;
include fastcgi_params;
}

}
next step is configure zabbix in php-fpm pool
 mkdir /var/lib/php/zabbix_php-fpm

chmod 770 /var/lib/php/zabbix_php-fpm/

chown root:nginx /var/lib/php/zabbix_php-fpm/

 vim /etc/php-fpm.d/zabbix.conf
config file should be like these
; Start a new pool named 'zabbix'.
[zabbix]

; The address on which to accept FastCGI requests.
; Valid syntaxes are:
;   'ip.add.re.ss:port'    - to listen on a TCP socket to a specific address on
;                            a specific port;
;   'port'                 - to listen on a TCP socket to all addresses on a
;                            specific port;
;   '/path/to/unix/socket' - to listen on a unix socket.
; Note: This value is mandatory.
listen = /var/run/php-zabbix.socket

; Set listen(2) backlog. A value of '-1' means unlimited.
; Default Value: -1
;listen.backlog = -1

; List of ipv4 addresses of FastCGI clients which are allowed to connect.
; Equivalent to the FCGI_WEB_SERVER_ADDRS environment variable in the original
; PHP FCGI (5.2.2+). Makes sense only with a tcp listening socket. Each address
; must be separated by a comma. If this value is left blank, connections will be
; accepted from any ip address.
; Default Value: any
;listen.allowed_clients = 127.0.0.1

; Set permissions for unix socket, if one is used. In Linux, read/write
; permissions must be set in order to allow connections from a web server. Many
; BSD-derived systems allow connections regardless of permissions.
; Default Values: user and group are set as the running user
;                 mode is set to 0666
listen.owner = nginx
listen.group = nginx
listen.mode = 0666

; Unix user/group of processes
; Note: The user is mandatory. If the group is not set, the default user's group
;       will be used.
; RPM: apache Choosed to be able to access some dir as httpd
user = nginx
; RPM: Keep a group allowed to write in log dir.
group = nginx

; Choose how the process manager will control the number of child processes.
; Possible Values:
;   static  - a fixed number (pm.max_children) of child processes;
;   dynamic - the number of child processes are set dynamically based on the
;             following directives:
;             pm.max_children      - the maximum number of children that can
;                                    be alive at the same time.
;             pm.start_servers     - the number of children created on startup.
;             pm.min_spare_servers - the minimum number of children in 'idle'
;                                    state (waiting to process). If the number
;                                    of 'idle' processes is less than this
;                                    number then some children will be created.
;             pm.max_spare_servers - the maximum number of children in 'idle'
;                                    state (waiting to process). If the number
;                                    of 'idle' processes is greater than this
;                                    number then some children will be killed.
; Note: This value is mandatory.
pm = dynamic

; The number of child processes to be created when pm is set to 'static' and the
; maximum number of child processes to be created when pm is set to 'dynamic'.
; This value sets the limit on the number of simultaneous requests that will be
; served. Equivalent to the ApacheMaxClients directive with mpm_prefork.
; Equivalent to the PHP_FCGI_CHILDREN environment variable in the original PHP
; CGI.
; Note: Used when pm is set to either 'static' or 'dynamic'
; Note: This value is mandatory.
pm.max_children = 50

; The number of child processes created on startup.
; Note: Used only when pm is set to 'dynamic'
; Default Value: min_spare_servers + (max_spare_servers - min_spare_servers) / 2
pm.start_servers = 5

; The desired minimum number of idle server processes.
; Note: Used only when pm is set to 'dynamic'
; Note: Mandatory when pm is set to 'dynamic'
pm.min_spare_servers = 5

; The desired maximum number of idle server processes.
; Note: Used only when pm is set to 'dynamic'
; Note: Mandatory when pm is set to 'dynamic'
pm.max_spare_servers = 35

; The number of requests each child process should execute before respawning.
; This can be useful to work around memory leaks in 3rd party libraries. For
; endless request processing specify '0'. Equivalent to PHP_FCGI_MAX_REQUESTS.
; Default Value: 0
;pm.max_requests = 500

; The URI to view the FPM status page. If this value is not set, no URI will be
; recognized as a status page. By default, the status page shows the following
; information:
;   accepted conn    - the number of request accepted by the pool;
;   pool             - the name of the pool;
;   process manager  - static or dynamic;
;   idle processes   - the number of idle processes;
;   active processes - the number of active processes;
;   total processes  - the number of idle + active processes.
; The values of 'idle processes', 'active processes' and 'total processes' are
; updated each second. The value of 'accepted conn' is updated in real time.
; Example output:
;   accepted conn:   12073
;   pool:             www
;   process manager:  static
;   idle processes:   35
;   active processes: 65
;   total processes:  100
; By default the status page output is formatted as text/plain. Passing either
; 'html' or 'json' as a query string will return the corresponding output
; syntax. Example:
;
;
;
; Note: The value must start with a leading slash (/). The value can be
;       anything, but it may not be a good idea to use the .php extension or it
;       may conflict with a real PHP file.
; Default Value: not set
;pm.status_path = /status

; The ping URI to call the monitoring page of FPM. If this value is not set, no
; URI will be recognized as a ping page. This could be used to test from outside
; that FPM is alive and responding, or to
; - create a graph of FPM availability (rrd or such);
; - remove a server from a group if it is not responding (load balancing);
; - trigger alerts for the operating team (24/7).
; Note: The value must start with a leading slash (/). The value can be
;       anything, but it may not be a good idea to use the .php extension or it
;       may conflict with a real PHP file.
; Default Value: not set
;ping.path = /ping

; This directive may be used to customize the response of a ping request. The
; response is formatted as text/plain with a 200 response code.
; Default Value: pong
;ping.response = pong

; The timeout for serving a single request after which the worker process will
; be killed. This option should be used when the 'max_execution_time' ini option
; does not stop script execution for some reason. A value of '0' means 'off'.
; Available units: s(econds)(default), m(inutes), h(ours), or d(ays)
; Default Value: 0
;request_terminate_timeout = 0

; The timeout for serving a single request after which a PHP backtrace will be
; dumped to the 'slowlog' file. A value of '0s' means 'off'.
; Available units: s(econds)(default), m(inutes), h(ours), or d(ays)
; Default Value: 0
;request_slowlog_timeout = 0

; The log file for slow requests
; Default Value: not set
; Note: slowlog is mandatory if request_slowlog_timeout is set
slowlog = /var/log/php-fpm/zabbix-slow.log

; Set open file descriptor rlimit.
; Default Value: system defined value
;rlimit_files = 1024

; Set max core size rlimit.
; Possible Values: 'unlimited' or an integer greater or equal to 0
; Default Value: system defined value
;rlimit_core = 0

; Chroot to this directory at the start. This value must be defined as an
; absolute path. When this value is not set, chroot is not used.
; Note: chrooting is a great security feature and should be used whenever
;       possible. However, all PHP paths will be relative to the chroot
;       (error_log, sessions.save_path, ...).
; Default Value: not set
;chroot =

; Chdir to this directory at the start. This value must be an absolute path.
; Default Value: current directory or / when chroot
;chdir = /var/www

; Redirect worker stdout and stderr into main error log. If not set, stdout and
; stderr will be redirected to /dev/null according to FastCGI specs.
; Default Value: no
catch_workers_output = yes

; Limits the extensions of the main script FPM will allow to parse. This can
; prevent configuration mistakes on the web server side. You should only limit
; FPM to .php extensions to prevent malicious users to use other extensions to
; exectute php code.
; Note: set an empty value to allow all extensions.
; Default Value: .php
security.limit_extensions = .php .php3 .php4 .php5

; Pass environment variables like LD_LIBRARY_PATH. All $VARIABLEs are taken from
; the current environment.
; Default Value: clean env
;env[HOSTNAME] = $HOSTNAME
;env[PATH] = /usr/local/bin:/usr/bin:/bin
;env[TMP] = /tmp
;env[TMPDIR] = /tmp
;env[TEMP] = /tmp

; Additional php.ini defines, specific to this pool of workers. These settings
; overwrite the values previously defined in the php.ini. The directives are the
; same as the PHP SAPI:
;   php_value/php_flag             - you can set classic ini defines which can
;                                    be overwritten from PHP call 'ini_set'.
;   php_admin_value/php_admin_flag - these directives won't be overwritten by
;                                     PHP call 'ini_set'
; For php_*flag, valid values are on, off, 1, 0, true, false, yes or no.

; Defining 'extension' will load the corresponding shared extension from
; extension_dir. Defining 'disable_functions' or 'disable_classes' will not
; overwrite previously defined php.ini values, but will append the new value
; instead.

; Default Value: nothing is defined by default except the values in php.ini and
;                specified at startup with the -d argument
;php_admin_value[sendmail_path] = /usr/sbin/sendmail -t -i -f www@my.domain.com
;php_flag[display_errors] = off
php_admin_value[error_log] = /var/log/php-fpm/zabbix-error.log
php_admin_flag[log_errors] = on
;php_admin_value[memory_limit] = 128M

; Set session path to a directory owned by process user
php_value[session.save_handler] = files
php_value[session.save_path] =  /var/lib/php/zabbix_php-fpm/
its time to changue permissions allowing nginx
chown nginx:nginx /etc/zabbix/web/
ln -s /usr/share/zabbix /var/www/
service php-fpm restart
service nginx restart
setsebool -P httpd_can_network_connect  on
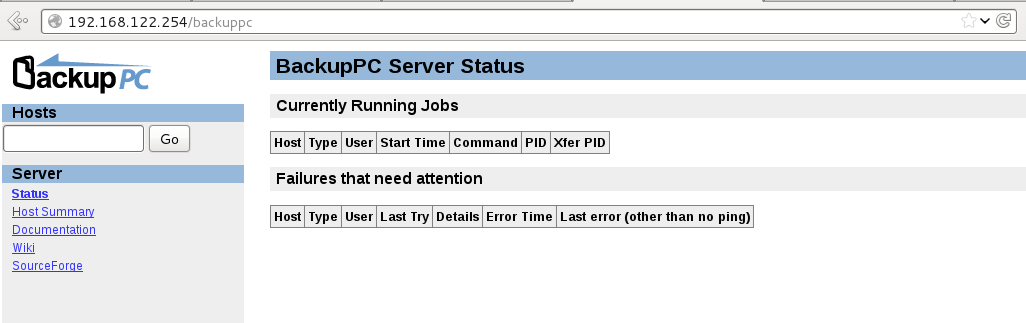
Open a web browser pointing to your domain and you should can view these screen
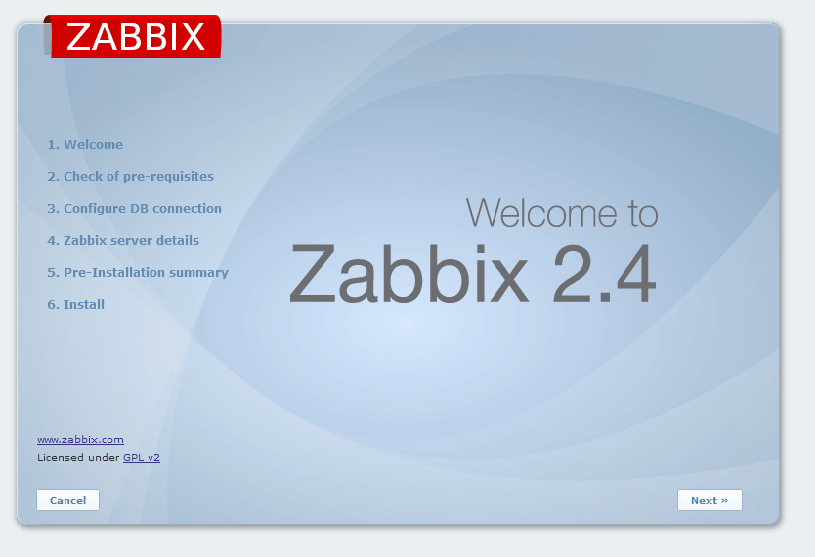
follow screen instructions and enjoy your new motorization service
And advice restart your server for check that everything will work ok if a power outage or another problem appears
webs from where i take info
creating a mysql backup user — http://bencane.com/2011/12/12/creating-a-read-only-backup-user-for-mysqldump/
Zabbix with nginx — http://qiita.com/ksworks/items/911561ef22687a13a70c
Nginx php-fpm secure — https://nealpoole.com/blog/2011/04/setting-up-php-fastcgi-and-nginx-dont-trust-the-tutorials-check-your-configuration/