Configure ups in centos 7

Having small servers at office requires try to avoid a small number of problems one of then are electrical supply falitures, a quick way to solve this is connecting a UPS to the server and forget about cross your fingers when a power outtage makes act of presence.

yukai_ups

In my case i have to configure a couple of small servers one with an old Yukai UPS and other with a Salicru ups.

If you want to get an ups  linux communication working follow  this steps:

Enable epel

yum install https://dl.fedoraproject.org/pub/epel/7/x86_64/e/epel-release-7-5.noarch.rpm

Install packages

yum install nut.x86_64 vim

Configure NUT

First search if your ups is supported in nut database and ensure that you select the desired driver Linux UPS Hardware Compatibility list

if your ups doesn’t appears in this list youl use your favourite web searcher for someone who try to fix these problems in case of Salicru appears to work with blazer_usb driver

vim /etc/ups/ups.conf

at the end of the file append these lines for mustek Yukai series


[yukai]
driver = blazer_usb
port = auto
desc = "Yukai PowerMust 600 usb"

next step is verify if your selected configuration is valid just type in your terminal

  upsdrvctl start

and shoud get some output like these

Network UPS Tools - UPS driver controller 2.7.2
Network UPS Tools - Megatec/Q1 protocol USB driver 0.11 (2.7.2)
Supported UPS detected with megatec protocol
Vendor information unavailable
No values provided for battery high/low voltages in ups.conf

Using 'guestimation' (low: 10.400000, high: 13.000000)!
Battery runtime will not be calculated (runtimecal not set)

after this you should configure your permissions ACL, in my case I only want query SAI status from the server only

so edit file /etc/ups/upsd.conf using this command

vim /etc/ups/upsd.conf

and append these text


ACL all 0.0.0.0/0
ACL localhost 127.0.0.1/32
ACCEPT localhost
REJECT all


after this you should add a user to check UPS status edditing   /etc/ups/upsd.users file

vim  vim /etc/ups/upsd.users

and append this text


[local_mon]
password = secretpass
allowfrom = localhost
upsmon master

Next step is link your ups with created user

add a line in file

 vim /etc/ups/upsmon.conf

with these content

MONITOR </etc/ups/ups.conf UPS name>@localhost 1 </etc/ups/upsd.users selected username> </etc/ups/upsd.users selected password> master

in this case

MONITOR yukai@localhost 1 local_mon secretpass master

Enable services

systemctl enable nut-monitor.service

systemctl enable nut-server.service

and start these services

systemctl start nut-server.service

systemctl start nut-monitor.service

sometimes at execute after execute “upsdrvctl start” command  it hijacks usb communication, this can be solved restarting system.

to check if ups is working just launch

upsc “ups name” and you should get an output like these

upsc yukai


battery.charge: 100
battery.voltage: 13.20
battery.voltage.high: 13.00
battery.voltage.low: 10.40
battery.voltage.nominal: 12.0
device.type: ups
driver.name: blazer_usb
driver.parameter.pollinterval: 2
driver.parameter.port: auto
driver.version: 2.7.2
driver.version.internal: 0.11
input.current.nominal: 1.0
input.frequency: 49.9
input.frequency.nominal: 50
input.voltage: 231.5
input.voltage.fault: 231.5
input.voltage.nominal: 230
output.voltage: 231.5
ups.beeper.status: enabled
ups.delay.shutdown: 30
ups.delay.start: 180
ups.load: 27
ups.productid: 5161
ups.status: OL
ups.type: offline / line interactive

references:

http://blog.shadypixel.com/monitoring-a-ups-with-nut-on-debian-or-ubuntu-linux/

Centos 7 Samba server workgroup

Step 1: Enable epel

yum install http://dl.fedoraproject.org/pub/epel/7/x86_64/e/epel-release-7-5.noarch.rpm

Step 2: Install packages

yum install samba samba-client samba-common vim

Step 3: enable service and open firewalld ports

systemctl enable smb.service
systemctl enable nmb.service
systemctl start smb.service
systemctl start nmb.service
firewall-cmd –permanent –zone=public –add-service=samba
firewall-cmd –reload

Step 4: Configure samba

cp smb.conf  smb.conf.orig

vim  /etc/samba/smb.conf


[global]
workgroup = "Put here your workgroup name"
server string = Samba Server Version %v
netbios name = "Put here host name you desire"
log file = /var/log/samba/log.%m
max log size = 50
security = user
passdb backend = tdbsam
local master = yes
load printers = no
cups options = raw
map to guest = Bad User

restart samba services

systemctl restart smb.service

systemctl restart nmb.service

now a computer running windows 7 your server should be visible in network host list

server visible in workgroupnow we will add a shared folder where all users can write even guest.

Step 5: Add a global write shared folder:

create a directory in your linux system where is located your shared folder

mkdir -p /home/commonfolder

chmod -R 0755 /home/commonfolder/

setsebool -P samba_enable_home_dirs on

chown -R nobody:nobody /home/commonfolder/

chcon -t samba_share_t /home/commonfolder/

add shared folder in smb.conf file

vim /etc/samba/smb.conf

it should look similar this example


[global]
workgroup = "Put here your workgroup name"
server string = Samba Server Version %v
netbios name = "Put here host name you desire"
log file = /var/log/samba/log.%m
max log size = 50
security = user
passdb backend = tdbsam
local master = yes
load printers = no
cups options = raw
map to guest = Bad User

[commonfolder]
path = /home/commonfolder
read only = No
guest ok = Yes

verify your config file

testparm

reload your samba configuratión

systemctl restart smb.service
systemctl restart nmb.service

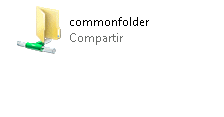
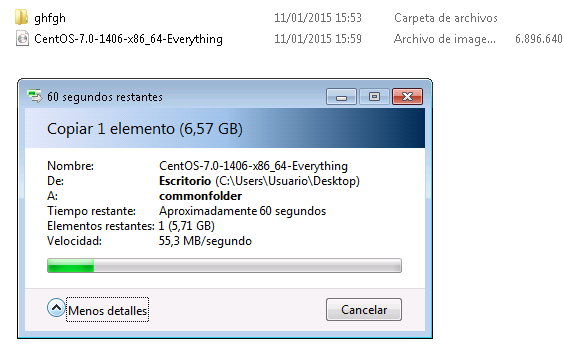
In your windows client machine click your samba server and verify that you can read and write in your shared folder

anonymous shared folderwriting anonymous shared folder

 Step 6: Add a secured shared folder

Now we will create a shared folder for our user peter, first we will create a system user

 useradd -s /sbin/nologin peter

groupadd smbgroup

usermod  -a -G smbgroup peter

set samba password for peter user

smbpasswd -a peter

mkdir -p  /samba/peter_share

chmod -R 0775 /samba/peter_share/

chown -R peter:smbgroup /samba/peter_share

chcon -t samba_share_t /samba/peter_share/

add Peter share in smb config file

vim /etc/samba/smb.conf

it should be like these

[global]
    workgroup = "Put here your workgroup name"
    server string = Samba Server Version %v
    netbios name = "Put here host name you desire"
    log file = /var/log/samba/log.%m
    max log size = 50
    security = user
    passdb backend = tdbsam
    local master = yes
    load printers = no
    cups options = raw

[commonfolder]
    path = /home/commonfolder
    read only = No
    guest ok = Yes

[peter]
        path= /samba/peter_share
        writable = yes
        browsable = yes
        guest ok = no
        valid users = peter

After this  restar your samba services

systemctl restart smb.service
systemctl restart nmb.service

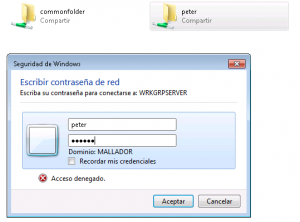
now you can access to your shared folder

samba autentificationSolving problems with user permissions in guest share

If user Peter try to modify data from commonfolder all data will be mapped agains user peter and can have problems to solve this add the option guest only = yes in commonfolder share options


[commonfolder]
path = /home/commonfolder
browsable =yes
writable = yes
guest ok = yes
read only = no
guest only = yes


References:

https://www.howtoforge.com/samba-server-installation-and-configuration-on-centos-7

http://www.unixmen.com/install-configure-samba-server-centos-7/